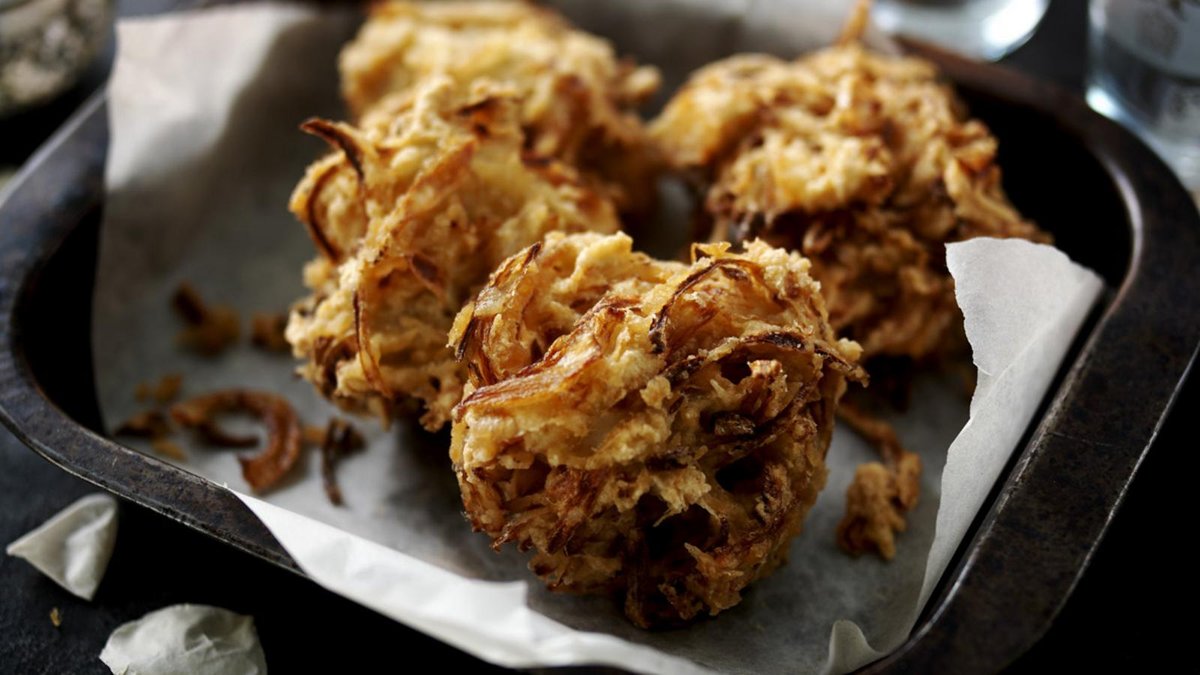
Ever bite into an onion bhaji, hoping for that shattering crispness, only to be met with a soggy disappointment? Mastering the art of these "onion barges" – as some affectionately call them – is all about understanding a few key principles, and thankfully, it's easier than you think to achieve restaurant-quality results at home.
At a glance:
- Learn the secrets to unbelievably crispy onion bhajis, avoiding the common sogginess trap.
- Discover which onion varieties work best and why uniform slicing is crucial.
- Master the batter consistency for optimal coating and texture.
- Find out how to troubleshoot common bhaji-making problems, from oil temperature to batter consistency.
- Explore alternative cooking methods: air frying and baking.
Why Homemade Onion Bhajis Triumph Over Takeaway
Let’s be honest: while ordering in is convenient, homemade onion bhajis always taste better. You control the quality of ingredients, the freshness of spices, and, most importantly, the crispiness factor. Plus, you can tailor the spice level to your exact preference. Store-bought versions often suffer from sitting too long, resulting in a sad, oily mess. Making them yourself ensures that perfect, freshly-fried crunch.
The Onion Question: Variety and Slicing Technique
The foundation of any great onion bhaji is, of course, the onion. Both red and yellow onions work well, but the key is thin and uniform slicing. Aim for slices about 1/8 inch thick. This ensures even cooking and prevents some pieces from being undercooked while others burn. Think of it like building a tiny raft: uniform planks make for a sturdier "onion barge."
- Red Onions: Offer a slightly sharper, more pungent flavor.
- Yellow Onions: Provide a milder, sweeter taste.
Experiment to find your favorite! A mandoline slicer can be your best friend here, guaranteeing consistent thickness.
The Salting Secret: Extracting Moisture for Maximum Crispiness
This seemingly simple step is a game-changer. After slicing your onions, place them in a bowl, sprinkle generously with salt, and let them rest for at least 20 minutes (up to 60 minutes is even better). This process draws out excess moisture, which is the enemy of crispiness. Imagine squeezing a sponge – that's essentially what salting does to the onions. The released moisture can be added to the batter later instead of adding more water!
Building the Perfect Bhaji Batter: Consistency is Queen
The batter is what binds everything together and creates that delectable crispy coating. Gram flour (chickpea flour) is the traditional choice, lending a nutty flavor and satisfying texture.
Here's a foolproof approach:
- Dry Ingredients: In a bowl, combine gram flour, your chosen spices (turmeric, garlic powder, cumin powder, chili powder – go wild!), and salt.
- Wet Ingredients: Gradually add the reserved onion juice and then water, a tablespoon at a time, until you reach a thick, gloopy consistency. Think pancake batter, but thicker. Aim for something that clings to the onions without being too runny.
- The Onion Squeeze: Before adding the onions to the batter, give them another gentle squeeze to remove any remaining water. This final step is critical!
- Combine: Toss the squeezed onions into the batter, ensuring they are well coated.
Is your batter too thin? Don't panic! Add 1-2 teaspoons of gram flour until you reach the desired consistency.
Frying Like a Pro: Temperature and Technique
Frying is where the magic happens. Use sunflower oil or vegetable oil, filling your deep pan with about 2-3 inches of oil.
Oil Temperature is Key: Heat the oil over medium-high heat. Test the temperature by dropping a small piece of batter into the oil. It should bubble vigorously and turn golden brown within seconds. If it doesn't bubble, the oil isn't hot enough. If it browns too quickly, the oil is too hot, and the bhajis will be raw inside.
Batch Cooking: Don't overcrowd the pan! Fry 4-5 bhajis at a time to maintain the oil temperature. Overcrowding lowers the temperature, resulting in soggy, oily bhajis.
Frying Time: Fry for 3-4 minutes per side, until golden brown and beautifully crispy.
Drain and Salt: Immediately after removing the bhajis from the oil, place them on a paper towel-lined tray and sprinkle with salt. This helps absorb excess oil and adds a final burst of flavor.
Beyond Frying: Air Frying and Baking Options
Want to enjoy onion bhajis without the deep-frying guilt? Here are some alternatives:
- Air Frying: Preheat your air fryer to 200°C (392°F). Place the bhajis in the air fryer basket in a single layer and cook for 10-12 minutes, flipping halfway through, until golden brown and crispy.
- Baking: Preheat your oven to 180°C (350°F). Place the bhajis on a baking sheet lined with parchment paper, brush lightly with oil, and bake for 30-40 minutes, flipping halfway through, until golden brown.
While air-fried and baked bhajis won't have the exact same texture as deep-fried ones, they are still a delicious and healthier option. They key is to get the right internal temperature.
Spice It Up: Unleashing Your Inner Flavor Alchemist
The beauty of homemade onion bhajis is the ability to customize the spice blend to your liking. Here are a few ideas to get you started:
- The Classic: Turmeric, cumin powder, coriander powder, chili powder.
- The Aromatic: Garam masala, ginger powder, garlic powder.
- The Spicy: A generous pinch of cayenne pepper or finely chopped green chilies.
- Subtle Aromatics: Carom seeds or cumin seeds
Don't be afraid to experiment! Start with small amounts and adjust to your taste. Remember, you can always add more, but you can't take it away.
Serving Suggestions: The Perfect Accompaniments
Onion bhajis are delicious on their own, but they truly shine when paired with the right accompaniments.
- Chutney: Mint-coriander chutney, tamarind chutney, or mango chutney.
- Raita: A cooling yogurt dip with cucumber and spices.
- Hot Sauce: For those who like extra heat.
Serve them as an appetizer, a snack, or as part of a larger Indian meal.
Troubleshooting: Common Bhaji Problems Solved
Even with the best recipe, things can sometimes go wrong. Here are some common problems and their solutions:
- Soggy Bhajis: This is usually caused by one (or a combination) of the following:
- Thickly sliced onions
- Low frying heat
- Too much water in the batter
- Overcrowding the pan
- Bhajis Aren't Crispy Enough: Make sure the oil is hot enough before frying. Consider adding a tablespoon of rice flour to the batter for extra crispiness.
- Bhajis are Burning on the Outside But Raw Inside: The oil is too hot. Reduce the heat to medium and continue frying.
- Batter is Too Soft: This could be due to the moisture in the onions, add a little more chickpea flour to adjust the consistency.
- Bhajis are falling apart in the oil: The batter may be too thin, adjust it with more chickpea flour. The onion is too wet, make sure to squeeze them!
Storage and Reheating: Bringing Bhajis Back to Life
Leftover onion bhajis can be stored in an airtight container in the refrigerator for up to 3 days. To reheat, preheat your oven to 150°C (300°F) and bake for 10-15 minutes, or bake at 200°C for 5–6 minutes, until heated through and crispy. You can also reheat them in an air fryer for a few minutes. Microwaving is not recommended, as it will make them soggy.
Ready to dive deeper into the world of crispy delights? Perfect Homemade Onion Bhaji provides a comprehensive guide to mastering this beloved snack.
Quick Answers: Your Bhaji FAQs
- Can I make onion bhajis gluten-free? Yes! Gram flour is naturally gluten-free. Just be sure to check the labels of your spices to ensure they are also gluten-free.
- Can I use plain flour instead of gram flour? While gram flour is traditional, you can use plain flour as a substitute, but the texture will be slightly different. Rice flour can also be added or substituted for extra crispiness.
- How long do onion bhajis keep? They are best eaten fresh, but leftovers can be stored in the refrigerator for up to 3 days.
- Can I freeze onion bhajis? While not ideal, you can freeze cooked onion bhajis. Wrap them individually in plastic wrap and then place them in a freezer bag. Reheat in the oven or air fryer until crispy.
- What is the best oil for frying onion bhajis? Sunflower oil and vegetable oil are both good choices. They have a neutral flavor and a high smoke point.
Your Crispy Bhaji Playbook: A Quick Start Guide
- Slice: Thinly and uniformly slice your onions.
- Salt: Salt the onions and let them rest for at least 20 minutes.
- Batter: Make a thick, gloopy batter with gram flour, spices, and water, using the reserved onion juice.
- Squeeze: Squeeze any excess moisture from the onions before adding them to the batter.
- Fry: Fry in hot oil until golden brown and crispy.
- Drain & Salt: Place on a paper towel-lined tray and sprinkle with salt.
- Serve: Enjoy with chutney or raita!
With these tips and tricks, you'll be whipping up crispy, delicious onion bhajis in no time. Say goodbye to soggy disappointments and hello to homemade deliciousness!
